Download the board template with Gorodets painting. Gorodets painting: how to learn. Thank you for your attention
Gorodets painting is one of the ancient Russian artistic crafts. These flower coloring stencils allow you to create incredibly beautiful patterns and ornaments. Thanks to decorative drawing, you can create flowers, a peacock, a horse, a bird, a rose, a cockerel and much more.
Gorodets painting is one of the ancient Russian artistic crafts
Gorodets painting begins with cutting spinning wheels. Various figures were cut out of wood and inserted into the recesses according to the appropriate shape. Later, craftsmen began to paint wooden figurines, gradually adding more new colors.
In the 19th century, craftsmen produced beautiful wooden figures in green, red, blue and other colors. They decorated houses and courtyards. The figures were pleasing to the eye, they were loved to be made, and children admired them. The painted rooster turned out to be very beautiful.
What could Gorodets spinning wheels be decorated with?
- Sled.
- Chests.
- Caskets.
- Furniture.
- Household items, etc.
Usually, the painting was symbolic. Genre drawings were valued. For example, a merchant and his horse or cockerel were depicted on the board. Elements of such painting have been preserved to this day.
Floral motifs were given special preference in this craft. Animals were also drawn, such as lions or bulls.
The favorite backgrounds in Gorodets painting for the masters of the 19th century were blue, green, in a word, bright and multi-colored. A black background was used less often.
How is painting done? And then and now the work is painted step by step with a brush. Step-by-step craft does not involve drawing from a finished layout. The blow of the hand on the board should be tight and strong. All the work of the master is quite painstaking, but at the same time, fast. By the nature of the technique, the work is not difficult.
For children in the kindergarten, preparatory group and preschoolers, there are many ways to start with simple Gorodets painting schemes, which you can print on the Internet, for example, depict it on the asphalt.
Gallery: Gorodets painting (25 photos)


Gorodets painting: lesson (video)
Gorodets painting: basic elements step by step
For such painting, special paints are required. They are called "tempera". Tempera paints are made from dry powders or their analogues. An alternative to such paints can be ordinary gouache, to which PVA glue has been added. If the master’s choice fell on gouache, then he should know that when painting in Gorodets, before painting the second layer of the drawing, you need to wait until the first layer has completely dried, otherwise the work will have a whitish tint.
All brushes must be dry, otherwise they will deteriorate after use.
The specificity of Gorodets painting is painting without a model, that is, the artist smoothly moves the brush over the surface. What artistic techniques can be used when painting? There are many of them, for example:
- Broad brush strokes.
- Fine lines with a fine brush.
- Masterly strokes with a medium brush.

This type of painting requires special paints.
On what surface is Gorodets painting performed? Usually wood is taken as the basis. If desired, you can create a colored background on it by painting the surface red, yellow or another color.
The work flow is as follows:
- To begin with, the master marks the approximate dimensions of the composition on the surface. You can use a pencil for this. At the same time, he does not draw the layout! This is necessary in order to outline the future size of all painting patterns.
- Many masters advise to outline the outline of the pattern not with a pencil, but with paints. In their opinion, this is the technology that is considered correct.
- The knots of the design are made with a thin brush and light paint. This makes the work look neater.
- Darker ones are placed on top of the light spots. This is the peculiarity of this craft.
- Before starting work, you should collect several different brushes, since it is convenient to draw different details in your own way. For example, thin lines will turn out beautiful only if you draw them with a thin brush.
- The main elements of Gorodets painting are the so-called “revivals”. These include points, circles, spirals, strokes and arcs.
Step-by-step decorative drawing based on Gorodets painting for children
- The beginning of the drawing is a life-size sketch of the diagram on wood. The size of the future work and its main elements should be outlined.
- To simplify the task, you can draw the size of the composition on paper, and only then transfer the image to a wooden surface.
- When the size of the ornament is applied to the wooden surface, you need to highlight the main center of the composition. After this, you can think about the color scheme.
- When the question of the composition and color scheme of the composition has been decided, you can begin to draw the ornament in detail.
- For children, it is recommended to choose simple drawings. For example, you can depict the sun. A red circle is drawn in the center, and rays next to it. The radial stitches should be the same size.
- At the end of the work, the wooden surface is varnished. A cutting board is perfect for this type of work.
It will be easier for your child to draw simple elements
Gorodets painting patterns for the older group
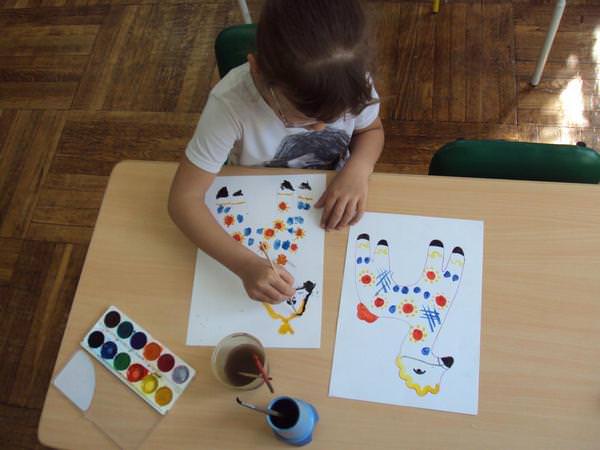
In the middle and senior groups in kindergarten, there is no need to choose too complex elements of painting, because if the child cannot cope with it, then he will be bored. To begin with, you can get acquainted with this drawing technique and write down a summary. The presentation will not take much time, but the child will know all the basics. You can opt for a simple ornament and draw a beautiful flower. Thanks to this little town painting you can create a bookmark for a book. This is a fascinating activity; appliqué always quickly interested children.
Drawing method:
- The work will use white, red, brown and green paints. Children should draw either on wooden boards or on shallow wooden plates.
- Use a pencil to mark the center of the composition and its size.
- Then you can start drawing the flower. A small red circle is drawn in the center. Red paint is then mixed with white to create pink. Another circle is drawn in pink, larger than the first. After that, the circle is red again and pink again. Thus, the flower has a multi-colored middle.
- The petals are made with green and brown paints. It’s better to alternate them, so the work will be more beautiful.
- You can combine green paint with white to get a lighter greenish color. They can be used to draw the petals from the inside. This drawing is done with a thin brush.

In the middle and senior groups in kindergarten there is no need to choose too complex elements of painting
The work is completed by varnishing the surface.
Gorodets painting: how to draw flowers?
Master Class:
- To begin with, select the surface and material with which the work will be performed. The more colorful it is, the better.
- The centers of the colors are marked on the surface with a pencil. A bright circle is drawn. Then petals are drawn in each circle. To do this, use a color darker than the core of the flower.
- Every flower must have a petal. Light green petals can be painted on the inside with a thin brush. You can also draw the outlines of petals and flowers with darker paint, but not black.
- The composition will be complemented by blue berries drawn next to the flowers.

a flower can be either complex or easy - it’s up to the master to choose
Gorodets painting: how to draw a horse?
- To do this you need to use black or brown paint. But for the horse to stand out, the background of the work must be light.
- The horse's body is drawn with a medium brush. First you can draw an outline for it, and then paint it. The limbs, tail and neck are drawn with a thinner brush. The animal's hooves are drawn separately.
- The horse's mane can be painted red.
- A beautiful ornament will decorate and complement the composition. You can make a picture frame for it. You can also draw a horse running towards the sun.
Gorodets painting: how to draw the Kupavka flower (video)
Gorodets painting can give a lot of positive emotions to its creator. The main thing is to draw with soul, because then even a novice craftsman will be able to create a real masterpiece.
Nadezhda Kovalchuk
Hello, dear friends and guests of your favorite site!
Gorodets painting- This is one of the traditional decorative crafts and ranks among the highest achievements of Russian folk art.
Oh, Russia, you are Russia,
Glory has not diminished
You are a townie, a townie
She became famous throughout the world.
Today I present to your attention a master class “Samples of step-by-step execution of flower painting from Gorodets patterns”
Description: The master class will be of interest to older preschoolers, teachers and parents. Children 6-7 years old will be able to complete the work with the help of adults, and older children - independently.
Purpose: master the step-by-step drawing of Gorodets flowers to create a Gorodets painting composition for decorating dishes or making a bouquet.
Target: teach children, teachers and parents how to paint Gorodets flowers step by step.
Tasks:
Fix the three main stages in drawing 5 types of Gorodets flowers: bud, kupavka, rose, chamomile and rose;
Develop a sense of composition and color;
To cultivate interest and respect for the folk art of Gorodets masters.
Materials: thin and thick brushes, gouache paints - red and pink, blue and light blue, orange, black and white, whole sheets and halves of A3 size paper.

Flowers are an indispensable part of any Gorodets work.
Gorodets painting is symbolic. Flowers in it are a symbol of health and prosperity in business.
Flowers of Gorodets painting:
Bud
Chamomile
Rosan
Kupavka
Rose
Gorodets masters love color and shade, and therefore they use red (cherry) and pink paint, blue and cyan, as well as brown, black and white to spice things up.
Making flowers using the Gorodets painting technique is divided into three stages.
Stage I of painting - Underpainting- This is a colored circle that will serve as the basis of any Gorodets flower.
Stage II of painting - Tenevka- pointing the petals. When we have painted circles of different colors we need (underpainting), we give the gouache time to dry. Then we begin to draw the petals depending on the colors that we want to depict. On a pink underpainting, the petals can be painted red, on a blue one - blue. In general, petals are always painted with a darker contrasting paint.
III stage of painting – Ozhivka– decorating flowers with white dots and strokes. The pattern comes to life. Done with the thinnest brush. For this we will need art brushes No. 2 or No. 3, as well as white gouache.
Rosan. Step by step drawing.
1. Using a simple pencil, draw circles on a sheet of paper.

2. Using a thick brush, draw and fill in an orange circle.


3. In the middle of the orange circle, draw a small red circle.

4. Draw a petal at the top and bottom of the large circle.

5. We continue to draw rounded petals along the edge of the circle.

6. Let's make it come alive. Carefully dip the tip of the brush into white gouache and decorate the rose with dots. First of all, we put a white dot in the center of the circle, and then around the circle.


Gorodets rose. Step by step drawing.
1. Draw the middle (bud) and petals with a simple pencil.

2. Paint the middle and petals of the rose red.

3. Using black paint, add a circle and an arc on top, and with a thin brush we outline the rose petals with black paint. We begin to draw an arc at first by only lightly touching the paper with the tip of the brush, then we apply strong pressure on the brush (while the brush leaves a wide, smooth mark) and complete the arc again with a thin line.

4-5. Animation of a rose: dots, petals.


Kupavka. A sample of step-by-step drawing.
3. At the top of the large pink circle is a small red circle, then draw an arc, and below, in the center, a red petal.
4. Draw red rounded petals towards the top, decreasing in size.
5. Animation of the bath: a dot in the center of a small circle, an arc and petals, dots in red petals.

Chamomile. A sample of step-by-step drawing.
1. Draw circles with a simple pencil.
2. Draw and paint the circle with pink paint.
3. In the center of the pink circle is a small red circle.
4. Draw one petal at the top and bottom symmetrically (dipping method.
5. Add petals.
6. Revitalization with white paint: a dot in the center of the daisy, dots in a circle, white petals between red ones.

Bud. Example of step-by-step drawing
1. Draw a small circle with blue paint.
2. Add a small blue circle at the top.
3. Using a thin brush, draw a blue arc in the shape of a month.
4. Draw white arcs - below and above.
5. Draw a blue arc in the middle of the bud.
6. Mesh bud options.


Thank you for your attention!
Publications on the topic:
The New Year is just around the corner and we are all thinking about what presents our preschoolers can make for their families. I want your attention.
Master class for parents of older preschoolers “Kaleidoscope of fun games with animal images” Master class for parents of older preschoolers Topic: “Kaleidoscope of fun games with animal images” Purpose: to introduce parents.
Master class: “Enriching the active vocabulary of older preschoolers through the use of word games.”
Nowadays there is more and more diversity in creativity. So I decided to try painting rocks with my children. Stones are natural.
Master Class. Painting a cutting board using the traditional “Gorodets” technique.
Author of the work: Alla Alekseevna Kondratyeva, primary school teacher at the Zolotukhinskaya Secondary School, Zolotukhino village, Kursk region.Topic: “Painted board using the traditional Gorodets technique”
Description of work: The master class is intended for children of preschool and primary school age. The material will be useful to educators, primary school teachers and additional education teachers.Purpose: interior decoration, gift, work for an exhibition, competition.
Target: painting objects using the Gorodets technique.
Tasks:
Educational: introduce Gorodets painting, teach basic painting techniques, teach how to paint objects using this technique, activate and interest children, get everyone involved in the work, develop techniques for painting floral elements of pattern painting with a brush.
Educational: develop cognitive interest, creative activity and the ability to apply acquired knowledge in practice.
Educators: to cultivate the ability to see beauty in the world around us, to feel the beauty of words, to arouse children’s interest in national culture through the means of arts and crafts, and to cultivate hard work.
Type of lesson: combined.
Type of lesson: theoretical and practical work.
Method: information-receptive, reproductive.
Equipment and materials: cutting boards, gouache, brushes, water jars, oilcloths for the table, napkins, acrylic varnish.
Visual aids: tables with products, products.
“Creativity opens in a child’s soul those hidden corners in which the sources of good feelings lie dormant” V.A. Sukhomlinsky.
Progress.
I. Updating knowledge. Psychological mood.Teacher(reads by heart)
The further we look into the future,
The more we value the past.
And we find beauty in the old,
At least we belong to the new.
Russia is the mother! Praise be to you!
Over the centuries you have seen a lot.
Whenever you could speak,
That would tell me a lot.
Today, guys, I invite you to look into the past of our vast Russia and find out Are the traditions of our ancestors still alive? and what is preserved for today's generations from the cultural heritage!
We are surrounded by a variety of objects, we encounter them both at home and on the street. Among this diversity, there are objects that were skillfully decorated by the artist; they are elegant and unique in their own way.

Look at the exhibition of objects, skillfully decorated with the hands of craftsmen, brushes and paints. These artistic objects belong to the decorative and applied arts. Craftsmen looked for patterns for painting in the world around us, and also invented them themselves. Each pattern had its own meaning. I invite you to touch with your heart the different types of folk crafts of our Motherland.
Guess the riddle:
Friends of different heights
But they look alike
They all sit next to each other,
How about just one toy?(matryoshka dolls)
(Girls come out - nesting dolls in Russian sundresses)
1 matryoshka:
Our Russia is great,
And our people are talented.
About our native Rus', craftsmen
Word spreads all over the world.
2 matryoshka:
Our Russian nesting doll
Doesn't age for a hundred years.
In beauty, in Russian talent
The whole thing is a secret.
1 Matryoshka– a real Russian beauty doll with a secret inside! There, inside a wooden, brightly painted nesting doll, there are cheerful little sisters hiding, a little less. Usually one toy consists of 3 – 24 dolls. The doll was named Matryoshka in honor of the Russian female name Matryona, which was often used to call girls in peasant families.

2 Matryoshka– one of the most popular Russian souvenirs. It has become a symbol of our country because it represents friendship and love, the wish for happiness and prosperity. The matryoshka appeared in the 90s of the 19th century in Sergiev Posad (Moscow region).
(The buffoon boys come out)

1 boy: Admire these wonderful spoons, cups and barrels, sugar bowls and glasses, vases and trays, wide dishes and ducks. All these household utensils were made by craftsmen from the large trading village of Khokhloma, which is located near Nizhny Novgorod.
The utensils carved from wood are coated with linseed oil, rubbed with aluminum powder, painted and fired, after which their sides sparkle with golden light. And the masters noticed the patterns in the meadows and forests - these are grass and leaves, flowers and berries. Just! And there is no end to admiration and delight!
2nd boy:
Golden Khokhloma,
Everyone admires her.
And in Paris and everywhere
Khokhloma flaunts.
(Two more girls in Gzhel costumes come out)
1 girl: (Gzhel)
In Gzhel they make dishes -
What a joy for the eyes!
The craftswomen are growing up,
Maybe among us too.

2nd girl:
Porcelain teapots, candlesticks, clocks,
Animals and birds of unprecedented beauty.
The inhabitants of Gzhel are proud of the blue sky,
You will never meet such beauty in the world.
1 girl: Gzhel painting is an ancient, traditionally Russian art, the origins of which originated in the Russian outback more than 670 years ago. “A gentle blue miracle - a fabulous Gzhel” - this is how people in Rus' affectionately called everyone’s favorite, amazingly decorated ceramics made of snow-white clay.
2nd girl: Gzhel motifs can be seen not only on porcelain, but also on paintings, embroidered and painted, and on clothes and bed linen. The Gzhel Center for Folk Ceramic Art is located near Moscow.
1 girl:
It's hard to believe: is it really possible?
Just two colors? Miracles!..
This is how artists from Gzhel
The skies are putting snow on it!
(Two boys run out with whistles)
1 boy:
I'll buy myself a whistle
I will trill
Masters from the glorious Haze
We will never forget.

2nd boy:
What is Dymkovo famous for?
With his toy.
There is no smoky light in it,
And there is the love of people.
There's something of the rainbow in her,
From a drop of dew.
There is something of joy in her,
Thundering like bass
1 boy: The Dymkovo toy was born in the settlement of Dymkovo, not far from the city of Vyatka. In the old days, residents organized folk festivals and fairs. Clay toys have always been the decoration of these holidays. The duck whistles whistle and shimmer with nightingale trills in response to all the voices. Horses, strange animals, different birds. Everyone whistles - both adults and children. This holiday was called Pandemonium.
(Two girls come out)

1 girl:
The guests admired the miracle,
Loudly admired -
Gorodets beauty
The slain remained.

2nd girl:
There is an ancient city on the Volga,
By name - Gorodets.
Famous throughout Russia
The creator with his painting.
Bouquets are blooming,
Bright colors of grief,
Wonderful birds flutter there,
As if calling us to a fairy tale.
If you look at the tablets,
You will see miracles!
Gorodets patterns
The hand came out subtly!

2nd girl: This master is Gorodets! The secret of this master is in a magic brush that brings animals, birds to life, and paints wondrous flowers, which are called roses and flowers. They are in the form of a circle and decorated with arcs and droplets of spring rain.
Teacher: Many, many years ago, in a city on the Volga, folk craftsmen began to make toys, dishes, spinning wheels from wood and painted them very beautifully: bright flowers, firebirds, and miracle horses decorated these objects. Nowadays, people drink tea from different containers, children play with different toys, and they don’t spin yarn on spinning wheels. But the beauty of Gorodets masters has not disappeared. And now it makes us happy: unprecedented birds, horses, fabulous flowers are painted on varnished wooden products. Painted plates, salt shakers, ladles, rocking horses, caskets - this is an incomplete list of Gorodets artists. All these products can be either home decoration or an everyday part of the kitchen or room. Traditional colors in Gorodets painting: red, blue, green, yellow, black, white.
There are three types of composition in Gorodets painting:
- flower painting;
- floral painting with the inclusion of the “horse” and “bird” motif;
- plot painting.
The easiest painting is considered to be floral.
Today we will play the role of Gorodets masters and try to depict flower painting.
II. Practical part: procedure for performing Gorodets painting:
Task: decorate the cutting board with elements of Gorodets painting.
1. This is the cutting board I suggest you make.

The wooden surface must be clean and dry.
Safety precautions: Now I’ll tell you a little secret of real masters: when working with paints you need to be careful so as not to stain yourself, your clothes and your work. Please note that the brush is a sharp object. You cannot swing your brush while working, you cannot turn towards each other. We open the jars of gouache, dip the brush into the glass and take the paint, a little on the tip, remove the excess from the edge of the jar of paint. The magic brush is ready to use.
2. The painting is done directly on a wooden base, which is primed with yellow, red, black colors. The primed surface needs to dry within an hour, so yesterday you primed the surfaces of your boards with yellow gouache paint.

3. Now on the cutting board with thin pencil lines we outline the composition of the future pattern: the main thing is to outline the location and size of the main, brightest spots - flowers, the middle details are unopened buds. They will connect large parts with each other, and small ones - twigs, leaves - will complement our composition. We will apply large details with a wide brush - these are spots of a regular round shape - the base of the flower.


4. Now let’s draw leaves between the large elements


5. On top of the light spots, apply thin strokes with a second, darker color of the same shade, for example, blue on blue - a stroke. The outline of the stroke is the petals of the flower. .

The entire painting consists of elements: circles - underpaintings, brackets, drops, dots, arcs, spirals, strokes.


6. The final stage of painting - apply strokes and dots with black and white paint. This technique is called “revival” and gives the work a finished look. We perform the “revival” with the thinnest brush.


7. Make the outline of the frame. Cover the surface with acrylic varnish. Let dry for 2 hours.
III. Summarizing. Reflection.
Today you tried yourself in the role of masters of decorative and applied arts. You have learned to paint objects using the traditional Gorodets technique. Let's see what wonderful work you have done.