Crockery hand painted. Clay painting: material preparation and enamelling. Learning beautiful painting on ceramics in a master class
We invite you to get acquainted with interesting art decorative painting on ceramics based on stained glass painting! This glass painting technique is suitable for children and adults, everyone can do it!
Master class Painting on glass and ceramics for beginners Trading House"Blick" (Author Katerina Oshkoder). The painting of the mug is made using materials and paints for painting on glass and ceramics, which are sold in the stores of the Trade House "Blik".
You will need:
Mug (or any other preferably white or light ceramic or glass object)
Carbon copy and printout of the picture - preferably black and white linear - to make it easier to understand - what exactly needs to be outlined.
Scotch tape, scissors, cotton pads, cotton swabs, toothpicks, nail polish remover.
Paints: any stained glass paints, the more liquid - the easier it will be for you, but in principle you can use any, including paints for glass and ceramics.
Advice from TD BLIK - use paints from PEBEO Vitrail, MARABU Glas Art or FERRARIO Vetro Color - it is very pleasant to work with them, they have good brightness, fluidity. These paints are solvent based, so if you don't like the smell of paint, choose the same but on water based- then the smell will not bother you!
Contours: in our MK we used contours for glass and ceramics Decola, Tair, Gamma, PEBEO. They were selected both by properties and by color! Use glitter outlines, glitters, anything that will make your work shine!
Sequins - with which we sprinkle the painting
Varnish for ceramics - you can use any varnishes, but we use a special varnish to cover the painting to prevent the sparkles from flaking and protect the work from external influences. You can also use glass varnish! It will give your work a beautiful gloss and depth.
Brush for painting No. 1-2 columns "Rublev", a flat brush made of synthetics approximately No. 12-20 for varnishing.
Good mood!

Progress:
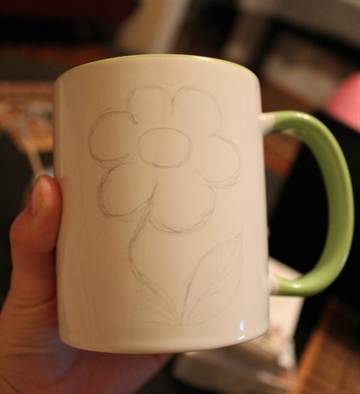
To begin with, you need to make a printout for the size of the product. (We have a mug painting, for which we took a picture with Mumi Troll). Then you need to cut out the printout and stick it on a carbon paper sheet. We also cut the paper to size. In this case, you stick this entire structure onto a mug and begin to transfer it to the mug with a pen, pressing hard.

It is necessary to translate only the most important drawing-forming lines, without being distracted by trifles - this will greatly help you in your future work.

According to the resulting picture, we begin to work with a contour. Having opened the contour, we must first push it onto a disc moistened with nail polish remover - in the future we will use it to wipe the nose of the contour. After that, you need to correctly position your hand on the subject. The hand must necessarily rest on the mug in any place; on weight you will not be able to create an even contour. The tube with it must be held horizontally to the surface, so that the spout moves away from the place of application only from left to right (or - if you are left-handed - then vice versa). And also we keep it exactly in the middle and the nose should almost always rest on the object being painted.
Outline with 1-2 colors only the main lines.

We wait until the contour dries, it usually takes 15-30 minutes, if you can't wait - dry it with a hairdryer from afar ONLY with cold air.
Let's open our colors. In the figure, we select the main thing from the whole composition - this is where we start. stained glass painting loves contrasts, so try to paint different colors in adjacent cells created by the outline. In the composition of the drawing, one color should be the main one, it should be at least 50% in the work, and 1-2 colors should occupy 20-30%. The main color should flow beautifully through the work if it is a multi-color composition. That is, to be present almost everywhere in the picture.
We hold the brush STRICTLY vertically at the end of its metal clip - that is, almost at the base. We work with paints without smears - we distribute them from a droplet in different directions, preferably - first near the contour. We paint over all the main space.

In our case, the sea was solved last, since we applied dry sparkles with a brush to the dried, but not yet completely dry paint, shaking them onto the paint.

The most creative stage is the additional decor. Since we are not engaged in painting, but decorative painting, then our drawing should not be an exhibit for the Hermitage, that is, we can supplement it with pleasant decorative pranks, for example, dots and strokes on the main drawing - that is, it is not necessary to figure out where to put them yourself - rely on what is already there. For example, we circled the moon, added leaves and flowers to the tree ... You can do it with other contours, with and without sparkles, as well as paint to create pearls and the glass effect VIVA Decor - they are also on sale in our store!

We finished the sky with a transparent paint with sparkles from the Lefranc and Bourgeois company from the Glass & Tile series - it has very beautiful sparkles, the color "crystal 698"


Blik Trading House invites you to plunge into the world of creativity! After all, you can buy all the materials presented here in our stores! The variety of materials for artists and just those who love creativity, even if only in their souls, will not leave anyone indifferent!
You can see the addresses of our stores and contact numbers on our website and in groups
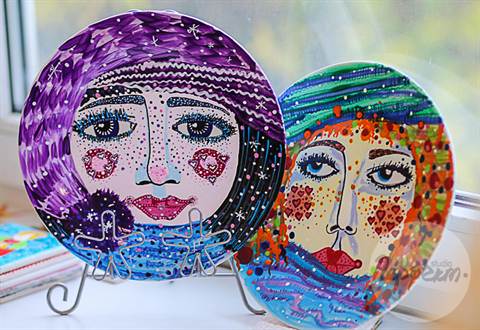
Ceramics and utensils are an important part of the kitchen interior and their appearance actually makes a big difference in shaping your mood. Agree, breakfast will be much more pleasant if it is served in pretty painted plates or cups.
Let's take a look at a few tutorials for beginners that will help you transform your ordinary plain plates into small DIY works of art using acrylic paints.
We will look at 3 basic techniques for painting ceramics with acrylic: plates, cups and mugs through a stencil, as well as a beautiful combination of marker and paint.
About - we talked about in this article!
How to hang 6 ways
- Once you have finished using the ceramic marker, close it with a lid, even if it is a small break in work. The tip can become clogged, and this can be avoided.
- Store markers in a horizontal position.
- It is important to put dishes in an unheated oven and heat up, when she's already there. Otherwise, it may crack from a sharp temperature drop.
- Acrylic translucent paints, so they are best used on white or light porcelain.
- If you want the paint to become less transparent, mix it with white.
Acrylic paint is resistant to washing (both manual and dishwasher) and microwave oven.
Please note that this paint is non-toxic. However, we do not recommend using it on surfaces that come into direct contact with food.
Master class number 1: black acrylic painting on a white plate
For this master class, you do not need a lot of acrylic paints, just one color is enough. But ceramics painted in this way will not look less impressive.

Materials:
- cups, ceramic plates, saucers (it is best to use porcelain or faience),
- tassel,
- black acrylic paint Pebeo Porcelaine 150 (or equivalent),
- damp cloth or towel.

Painting technology: 
- At first practice drawing on paper so as not to edit the dishes once again. But if there is a mistake on the dishes, it can be corrected with a damp cloth.
- Draw a picture on the dishes. It can be flowers, stars, polka dots, small lines, or anything else that comes to your mind.
- Translucent paint, so for a clearer drawing, apply more than one layer.
- leave dry for 24 hours.
- After this time, set dishes in a cool oven, set the temperature to 150 ° C. Once the oven has reached the set temperature, leave to bake.
- When the time has elapsed, turn off the oven and allow the dishes to cool before removing.
- The result is beautiful dishes that only you have!


Master class number 2: painting mugs and cups with acrylic paint
A fairly simple drawing will be used here, which does not require special artistic skills, so all you need is desire, materials and a little time.

Materials:
- white cup (mug) and saucer (ceramic or porcelain),
- marker Pebeo Porcelaine 150,
- several colors of acrylic paints (blue, sapphire, white, rainbow colors),
- one or two brushes
- palette for mixing paints (you can use a plate),
- a few cotton swabs (to correct mistakes),
- alcohol or glass cleaner, ordinary kitchen stove.

Painting technology:
- First you need alcohol or window cleaner clean ceramics and dishes from fingerprints or grease.
- We draw on the cup and saucer (except for the center of the saucer where the cup is placed) raindrops, that is, their contours. Draw a rainbow in the center of the saucer.
- Thus, it turns out that when the cup is on the saucer, the rainbow will not be visible, but when the cup is lifted from the saucer for tea drinking, there will be a pleasant little surprise, iridescent in the literal and figurative sense of the word. Remember that the paint dries in 5-10 seconds.

TIP: If you have never used a marker before, you need to get the paint to start flowing out of it. To do this, you need to shake it for about 30 seconds, and then press the tip onto a sheet of paper until the paint starts to flow. Once the paint has gone, you can start painting.
- Take a medium size brush to paint the raindrops. Use blue paint. You can paint right away with the paint that is in the bottle, or you can add a little water so that the color is not so saturated. Do not shake the paint, this can create bubbles that will reduce the quality of the drawing.


If you got out a little beyond the contours and the paint has not dried yet, this can be corrected with a cotton swab or napkin. If the paint is already dry, first moisten a cotton swab with alcohol, and only then correct the mistake. If a big mistake was made during painting and you want to start over, then rinse dishes under warm water or wipe with alcohol and let it dry well before starting again.

- These paints mix well with each other, so you can paint some of the droplets with blue, then mix with sapphire and paint the rest. You can paint a part with just paint, and often with paint mixed with water.
- It is important to wash and wipe the brush well when switching to each new color of paint.


- After you finish the raindrops, move on to the rainbow. To do this, use a very thin brush so that the drawing is neat and does not crawl out of the contours.
- Remember that green can be obtained by mixing yellow and blue, and orange can be obtained by mixing red and yellow.
- The drawing is already finished, but this dish is not yet ready for use. Leave to dry for 24 hours.
- After this time, put the dishes in a cool oven, set the temperature to 150 ° C. When the oven warms up to the set temperature, set a timer for 30 minutes and leave to bake. When the time has elapsed, turn off the oven and allow the dishes to cool before removing.
- Now that's all. You can enjoy your tea!

In general, with the help of the same tools, you can draw any other drawing that appears in your imagination.

Master class number 3: Stenciling a plate
If you are worried that you will not be able to immediately take and draw something on a plate, then a stencil can help you. It is also useful if you want to make a set of dishes from several identical plates or cups, then the stencil will help save time and achieve identity.

There is one trick to know about this method: the stencil must be removed before the paint begins to dry, as it can then be removed with some of the paint.
Materials:
- porcelain, ceramic or even paper plates,
- acrylic paint,
- stationery knife,
- contact paper for stencil,
- brushes,
- oven.

Manufacturing steps:
- You can draw stencils yourself or you can take already finished drawings and print them on contact paper.
- Lay the patterned contact paper on the plate.
- Carefully cut out the pattern with a utility knife.
- Using a brush, apply paint to the plate inside the stencil. If you mixed colors and different colors, make sure that you get enough paint for all the plates so that they are all the same.


- Leave to dry for 24 hours.
- After this time, put the dishes in a cool oven, set the temperature to 150° C.
- When the oven reaches the set temperature, set the timer for 30 minutes and leave to bake. When the time has elapsed, turn off the oven and allow the dishes to cool before removing.


The set of dishes is ready!
All dishes painted with these paints can be used for food. But it can also be used in decorating rooms. Either way, she's beautiful and unique!
Ideas for painting ceramics
Below are some ideas and drawings for decoration. ceramic dishes and inspiration. Such plates self made is, Birthday or Valentine's Day.


Stencils for painting
The easiest way to paint is, of course, a stencil. If you really don’t know how to draw at all or don’t like to draw, we take the finished drawing, print it out, cut it out and attach it to the plate with adhesive tape. We paint in the desired color.
Here are the most simple and popular stencils for plates.
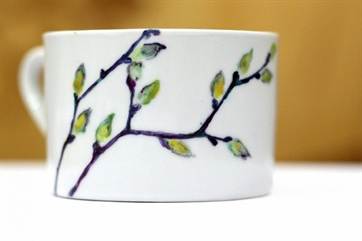
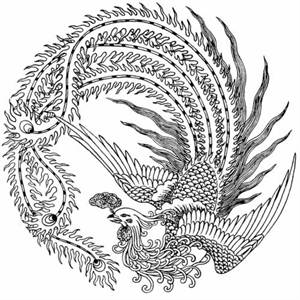
Fans of drawing should learn to paint on ceramics. The master class will tell novice masters what materials and tools will be needed for work, and also talk about general stages doing painting. Exist different kinds and methods of painting on ceramics, many of which were known in the Middle Ages. Dishes decorated with bright and interesting painting always look lively and new, and a drawing made in the author's style can tell a lot about the master and his artistic vision.

Painting can be done even by children and those adults who cannot draw or think they cannot. Today's hobby and art stores offer a variety of materials, tools, templates and fixtures that will make creative process not only pleasant, but also convenient.
What is necessary
Before you start painting, you need to prepare everything necessary materials and tools.

First of all, this paints and brushes. Most often, painting on ceramics is done with water-based acrylic paints. If desired, the finished craft can be coated with acrylic varnish for better protection and greater fixing of the paint. In addition, you can use contour paints, which are well suited for spot painting and finishing the finished work.

For products intended for food products, it is recommended to use special baked paints. The painting made with such paints must be fired in special ovens at 800 degrees. After that, you can safely and safely eat from the painted dishes, without worrying about the safety of the painting and your health.
Brushes for painting are natural, for example, squirrel or synthetic with soft bristles.
It is better to stock up on brushes of different sizes so that you can paint both large details and the background, and draw small elements of the picture.
You will also need drawing or pattern. If the author draws well and is not deprived of imagination, then you can do without the finished image. Beginners can buy or make stencils.


You should start with simple drawings and patterns, using only paint and brushes. In the future, you can choose more "branchy" patterns of ornaments or complex plot pictures. A combination of several painting techniques using different additional materials and experimenting with colors and paints can turn a hobby into an art.
In addition to paints and brushes, you will also need:
- surface degreasing liquid - alcohol, nail polish remover, vinegar;
- cotton pads;
- carbon paper for transferring drawings;
- soft pencil;
- scotch;
- acrylic lacquer.
Progress
Exist various techniques painting on ceramics. It can be a simple dot painting using templates or complex artistic drawings made by hand. It all depends on the wishes and imagination of the author. You can paint ceramic or earthenware, covered with glossy or matte glaze - dishes, mugs, teapots, pots, etc. Consider how you can make a painting on the example of a cup and plate.
The painting begins with the selection of a suitable drawing as a template. To decide on a stencil, you need to choose the style of the future crafts. It can be a strict geometric pattern, abstraction, ethnic ornament, plot. For inspiration, it is worth looking at a few photos of painted dishes.


The mug, as a rule, is small in size and has rounded shapes, which must be taken into account when choosing a pattern. On the cup, you can depict fruits, animals, plots, as well as rounded patterns and ornaments in the form of a border.


Stencils and patterns for mugs can be as follows:


The cymbal gives more flight for creativity as it is quite large in size and flat in shape. On a plate, as well as on a sheet of paper, you can depict anything you like. It can be both ornaments and whole plots made by the master by hand. The peculiarity of the painting is that the image and patterns must be entered in a circle.
Here are some examples of plate templates:


Do not forget about folk craftsmanship - Gzhel, which looks very good on ceramic plates. To make such a painting, it is enough to transfer the pattern you like through carbon paper (outline lines) or redraw it by hand.
Before you start painting a ceramic surface, it is recommended to practice making Gzhel patterns on paper with gouache. With blue and white paint, wide strokes are made with a brush to make flower petals.

Gzhel patterns on a plate can be as follows:


So, artistic painting on ceramics is performed as follows:
- Degrease the surface with a cotton pad soaked in alcohol or nail polish remover;
- Fix a stencil on a ceramic product with adhesive tape or transfer the contour drawing to the surface through a carbon paper (you can also draw it by hand);
- Start painting the background and large details of the transferred drawing with a brush and paints, adhering to the outlined contours;


- Draw small details with a thin brush, contour or marker;


- Leave the craft to dry (approximately 24 hours);
- Finish with a protective acrylic lacquer if desired.
Depending on the method of painting and the idea of the master, the stages can be adjusted. For example, if you plan to make a dot painting, then you can start immediately along the contours after transferring the drawing to the surface and not paint the image with acrylic. Also, before painting, you can circle all the elements with a contour.


It is always a pleasure to make a beautiful and at the same time useful, functional thing with your own hands. Having mastered painting on ceramics, you can create unique and original table sets, tea sets, surprise and delight loved ones and relatives.
In the era of ancient civilizations and antiquity, household painting of dishes turned into a real art. Archaeologists believe that at the dawn of time, women were engaged in painting household utensils.
- Paints for painting plates
- Patterns for painting plates
The history of painting ceramic plates and dishes
The simplest patterns and ornaments first appeared on ceramic dishes about 6 thousand years ago. In the era of ancient civilizations and antiquity, household painting of dishes turned into a real art. Archaeologists believe that at the dawn of time, women were engaged in painting household utensils.
Plates and other kitchen utensils were decorated with all kinds of magic circles, lines and intricate signs. On some dishes one could find images of people, animals, plants.
Our ancestors often painted plates according to their purpose, for example, a fish dish was decorated with images of fish, game or fruit plates were also decorated with appropriate patterns.
In the era of ancient civilizations, plates richly painted with ornaments and plot drawings adorned the chambers of kings and nobles. Art painting ceramic utensils laid the foundations of the fine arts.
The technique of painting plates and the features of the ornament were determined by the area and the customs of the people who lived on it.
This is interesting:During a medieval meal, food was placed on a large slice of bread. Plates were used only for serving main dishes.


Dot technique for painting plates
Nowadays, painting plates with your own hands is an unusually exciting activity. The materials necessary for this hobby can be bought at the nearest store, and it is not difficult to find hundreds of them on the Internet. good examples execution.
If classical painting with brushes is suitable only for real artists, then everyone can master the dot painting of plates (having perseverance and patience).
The principle of dot painting is a set of small dots from which an ornament is formed on a plate.
The main conditions for the successful application of this painting technique are:
- The same distance between the points (the smaller the better)
- The size of the dots should correspond to the size of the details of the picture - large dots for large, small dots for small details
- A steady hand and the right paint consistency (not runny or thick)


Paints for painting plates
Craftsmen use various glazes and paints to decorate ceramic dishes.
The following types of paints are used for painting plates
- Overlay under glaze
- Superimposed on glaze
- penetrating the glaze
The task of the glaze is to create a smooth, shiny surface on the plate.
When painting dishes with your own hands, water and acrylic paints superimposed on glaze


Patterns for painting plates
You can decorate the dishes with any image that your heart tells you. Usually, drawings for decorating plates can be divided into three groups
- ornaments
- Story drawings
- Large images
Ornaments are patterns consisting of ornate lines, circles, rhythmically connected and repeating.
Plot drawings depict scenes from books, various life situations, fantastic ideas, etc.
Large images of geometric shapes, parts of the face, lines, etc. is the easiest to implement.
This is interesting: In Rus', bowls (small dishes with a flat bottom) have long been used. The word "tarel" became known to the Russian people only in the 17th century.


An example of painting a plate with paints:
MK "painting on glass" I hope you like it and you will learn something new!
For work we need:
Glass plate, glass and ceramic paints, glass outlines, alcohol (or alcohol-based product) template. 
I start by finding an interesting pattern for painting! Of course, you can sit by yourself - think about the drawing, but I went the easy way! The template was drawn from the computer. (By the way, here is the site with interesting patterns stylized flowers)
It is better to circle the plate first, and then draw! 
full size
And you can also take a paper napkin with an interesting pattern and put it under the plate - you get a wonderful replacement for the template 
Now we wipe the plate with alcohol (or vodka, or an alcohol-containing solution)
We put the template under the plate - it is better to use 2 identical plates, and lay the template between them - this way it will be fixed and fit snugly against the plate 

Let's start tracing the drawing with a contour - it will not allow the paint to spread over the entire plate! It is important here that the hands lie comfortably so that the line runs smoothly. To begin with, it is better to practice the contour on paper, and only then move on to the selected surface. If something didn’t work out, it’s not scary, you can immediately wipe it with a cotton swab dipped in water, then wipe this place.
(characteristics of the contours can be found here http://www.golandart.ru/mat2.html) 
We let the contour dry, ideally 2-3 hours, but if you are in a hurry, you can dry it with a hairdryer! 
We fill our contour with paint for glass, take our time, in hard-to-reach places we help with a brush or a toothpick! Do not cover all areas at once, so that your paint does not accidentally come out and mix with paint in an adjacent area 
A lot depends on the colors, because the colors are different! Characteristics of paints can be found here http://www.golandart.ru/mat1.html
We leave the plate to dry, because. I have stained glass paints, then 4-5 hours will suffice. 
The plate can then be coated with acrylic varnish, or you can leave it like that.
Such a plate will wonderful decoration interior or a gift for family and friends. 

BUT, in addition to the plate itself for painting and paints, I needed: a glass cleaner to degrease the plate, a stained glass outline on glass, brushes, a sheet of paper with a printed pattern, adhesive tape to attach the sheet with a butterfly to the plate, scissors and a pencil.
At first, of course, I practiced, tried to paint glass jars and bottles that can always be found at home. And then I came across a transparent plate 30 × 30 square. I decided to paint something bright and joyful on it! Let it be a butterfly! No sooner said than done! 
I found a suitable drawing, copied it, attached it to the wrong side of the plate and started!!!
First, I outlined it with a stained glass outline on glass and ceramics, and then poured multi-colored pieces stained glass paint for glass. I made a blot and quickly stretched it over the desired area to be painted over with a brush ... 
Even in this work on the plate, I used the dot technique. On a simple transparent glass, the butterfly looked rustic! Therefore, I applied a matte background (Ultra frost effect paint for glass), smacking the foam on all areas of the glass on the plate where there was no pattern. When I finished with the background, I realized that my butterfly is very lonely alone. Then I added colored transparent "shreds" to it along the edge of the plate. It turned out very bright and pretty. Then I circled and connected all these bright inserts with one line using dot technique and the plate is ready. In my opinion - not bad, but what do you think about this?