Decoupage with help. Decoupage starter kit for beginners. Decoupage is done with
Decoupage is a fascinating and uncomplicated activity that has many techniques and is accessible even to the youngest craftswomen. With it, you can make exclusive interior items that will decorate not only your home, but also the exhibition halls of art galleries. In this review, we will look at how to perform do it yourselfdecoupage for beginners step by step with photo. Do not worry that something will not work out, in fact, everything is very simple. With the help of this technique in your home will gain new life old furniture, dishes, from shoes and many other things.
Decoupage products - works of art
First of all, let's deal with the definitions. Decoupage is gluing a pattern onto a surface. The picture can be placed on wood, leather, fabric, glass and almost any other product.
Reverse decoupage is the same process, which has only one feature - the picture is glued under the material. This can only be done on transparent surfaces: glass and plastic. Of course, the picture in this case is pasted face up.
For your information! If a plate is used for direct decoupage, then in the future it will only perform a decorative function. And when using the reverse technique, the dishes can be used in normal mode.
Tools and materials for work
| Materials and tools | Note |
| Using this technique, you can decorate a book, dishes, flower pots, bottles, furniture,. In general, literally everything that is in your house. |
| Pictures can be used from special decoupage cards, napkins. In addition, for this purpose, craftswomen use drawings on fabric, old newspapers, and magazine clippings. |
| You can use ordinary nail scissors or a special tool that is sold in needlework stores. The main thing is that the edges of the blades are very sharp. This is the only way to carefully cut out the desired image on a thin napkin. |
| You will need flat soft brushes. The pile in them should be tightly fixed. A “lost” lint can be a serious problem. It is better to have several brushes of different widths for smoothing and applying glue and varnish. |
| It is best to use ordinary household PVA. You can buy a specialized composition, but it will cost more. From varnishes it is better to give preference to acrylic. It does not emit toxic substances and is easy to use. |
| To decorate the work, acrylic-based paints, sponges, primer, sandpaper, craquelure can be useful. |


Decoupage kits
Basic tricks
You can fix the drawing on the surface in different ways, let's look at them:
Method one
A simple technique for decoupage from napkins is to lay it on an object and fix it with glue. After drying, the surface is varnished.

Method two
For reverse decoupage use transparent base. The image is glued face down to the glass. After drying, fix with varnish.

Method three
Artistic composition. For its manufacture, many images are used, which, when glued, are combined into one. To make the picture look like one whole, painting, shadows and accents are added.

Method four
This technique is called "decopatch". For her, they use pictures from magazines, drawings on fabric. To get rid of clear boundaries, the edges of paper drawings are cut off. The surface is completely filled with images.
Method five
Creating a three-dimensional image. This is a technique that requires the talent of an artist. First, an image from a paper napkin is pasted. And then a painting is done on it with a careful drawing of all the smallest details.
Decoupage bottles for beginners: step by step with photos and recommendations
- the simplest and most affordable material from which you can make an original gift. You can buy a bottle of wine or fill the container with your own drink. Luxurious decoration in any case will impress.

We have already listed the materials and tools necessary for the work, so we will not dwell on this in detail. The only thing that needs to be added to the list is a windshield wiper. They pre-treat the bottle cleared of labels.
Important! It is better to work with a glass vessel with gloves. Your fingerprints are unlikely to have artistic value, so it's best not to leave them.
The sequence of bottle decoupage for beginners, step by step with a photo:
| Illustration | Stage description |
We apply soil 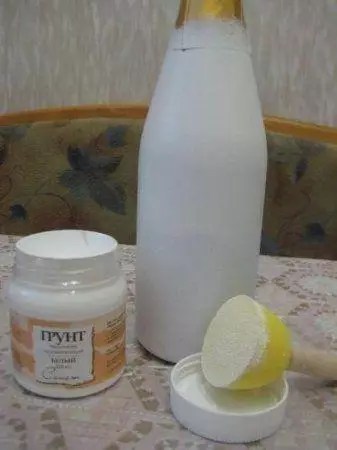 | For priming, you can use acrylic varnish or PVA. The soil should dry well. |
Making the background 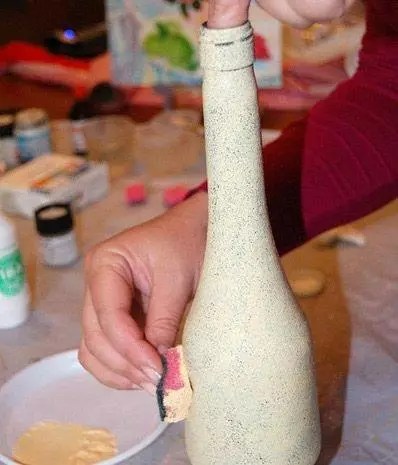 | As a background, you need to take white or light acrylic paint. It may be necessary to apply the composition in two or even three layers in order for the surface to become completely opaque. |
Applying images  | The pattern on the napkin is carefully cut out with scissors. If the background of the picture and the bottle match, do without scissors, carefully tear off the napkin. To make the drawing on the printout easier to apply, it should be soaked in a plate of water. |
Fixing the drawing  | Lacquer must be applied to the surface of the drawing. This can be done with a soft flat brush or spray gun. Care should be taken that the picture is not covered with folds. It must be gently smoothed with a brush if necessary. |
Finishing  | After complete drying, you can gently sand minor flaws in the work. To emphasize the details, use a brush and dark paint. After finishing, apply a final coat of varnish. |
Another version of the original design is decoupage of the bottle with tights. Master class on video:
Some decoupage tricks on glass for beginners: step-by-step recommendations with a photo of drawing a pattern from napkins
The first experience of gluing a napkin can be unsuccessful: wrinkles and folds inevitably appear, which spoil the whole result. A few tips on how to avoid this:
- To apply a pattern on a convex surface, you can make “tucks” on it. Cut the edges of the pattern with scissors or even cut out triangular pieces. WITH last option it is better to be careful, there is a risk of spoiling the image if the cut angle is incorrectly calculated.

- You can apply glue to the surface, and then attach the drawing and straighten it with a brush. Another method would be no worse - apply glue on top of the picture, while straightening it.
- If the image is applied to an almost flat surface, you can pour glue into the center, attach a napkin and gently disperse the composition, spreading the material over the surface.
- On a perfectly flat sheet, you can stick an image with an adhesive pencil.
- You can apply a picture with a piece of polyethylene (bag or stationery file). The drawing is placed face down on polyethylene and moistened with water. Then the package with a wet napkin is applied to the pasted surface. The package is removed, the napkin remains.

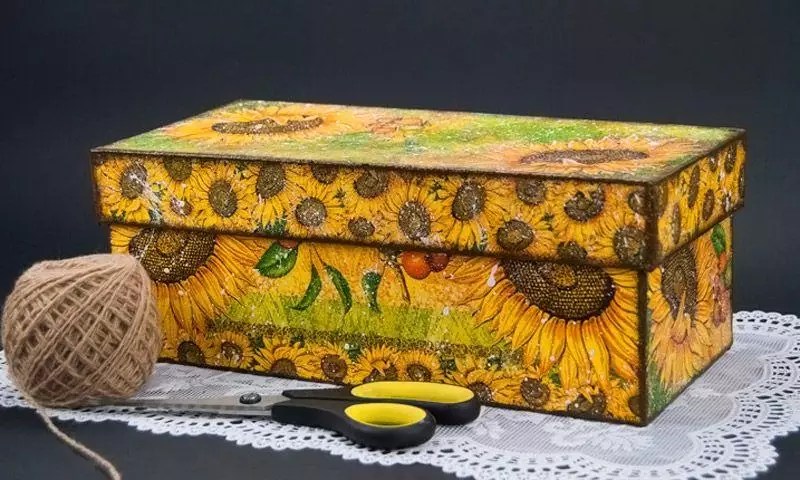
A simple master class for decoupage shoe boxes
Smooth surfaces cardboard box from shoes - an excellent basis for decoration. Such an interior box will become a favorite place for household trifles.
| Illustration | Stage description |
Surface preparation 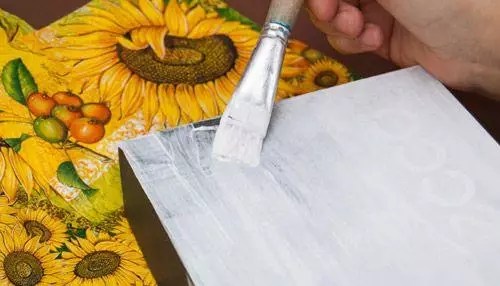  | The corners of the box must be reinforced with pieces of masking tape, then primed with an acrylic primer or paint. After drying, the primer should be lightly treated with fine sandpaper. It may be necessary to repeat the procedure if the layer does not lie flat enough. After you need to paint the box with the color chosen for the background. |
drawing 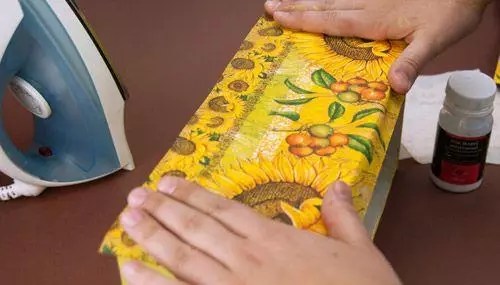  | The place for the drawing is covered with decoupage glue. After the layer has completely dried, a pattern is applied on top and smoothed out with a hot iron through a sheet of paper. After the napkin is covered with a thin layer of varnish. Too thick a layer will cause the pattern to blister. This procedure is repeated over the entire surface of the box. |
Decoration and refinement 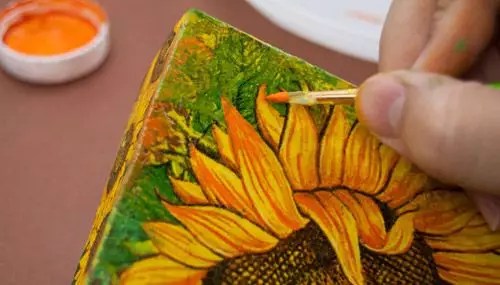  | With a foam sponge, background paint and other shades are applied to match the image. Small details are drawn with a brush. To add some casualness, you can splatter white paint on top with the bristles of a toothbrush. Then the final varnish is applied. |
Decoupage furniture in Provence style: a master class for updating a chest of drawers
Having tried your hand at simple things, you can safely proceed to do-it-yourself decoupage with napkins. In addition to the usual list of working materials, wood putty will be required. She pre-levels all the cracks, cracks and other irregularities on the surface of the chest of drawers, cleaned of old paint.
Do-it-yourself kitchen furniture decoupage sequence, photo and description:
| Image | Operation description |
Preparation  | Furniture must be thoroughly cleaned of all layers, smooth out defects with putty. After drying and grinding, all surfaces are primed and rubbed with sandpaper-zero. |
Preparing pictures  | The pattern on the napkins is carefully cut out or cut off by hand, the bottom layer is removed. The picture is smeared with glue and applied to the furniture. The application is carefully spread with a brush. |
Finish coat 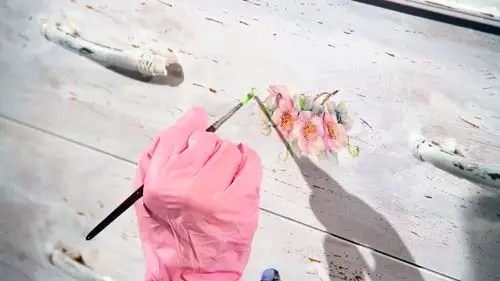 | No need to hurry. All drawings must dry. All furniture should be varnished, not just the place of decoration. On large areas, it is convenient to do this with a spray gun or spray can. So the varnish will lay down in a thin layer. For the best effect, apply 3-4 coats in succession, waiting for complete drying between treatments. |
 | Result. |
Helpful advice! If you need to apply a pattern on a polished surface, polishing is pre-treated with sandpaper until the shine disappears.
When decoupling furniture with a cloth, the process practically does not differ from that described.
 You have not studied in art or music school, but dream of creating real masterpieces, decorating your apartment with them, delighting friends and colleagues with extraordinary gifts? Then you should master the technique of decoupage. It allows you to create extraordinary things from napkins, and all you need for this is accuracy and artistic taste.
In this article we will tell you what decoupage is, what can be done using this technique and what you need for decoupage for beginners. At the same time, we will not only list necessary tools and materials, but also give advice on their choice.
Many-sided decoupage
To turn into a work of art using the decoupage technique, any objects that have a smooth surface are suitable. Minor roughness is not a problem, they can usually be easily cleaned with sandpaper. In particular, fit:
- tree;
- glass;
- metal;
- ceramics (dishes, tiles);
- plastic.
Thus, you can decorate using the decoupage technique:
- bottles;
- vases;
- banks;
- storage containers for bulk products;
- dishes;
- caskets;
- cutting boards;
- stools;
- tables;
- dressers;
- bedside tables;
- lockers.
If you wish, you can make the furniture look vintage - certain tricks will allow you to do this without much difficulty.
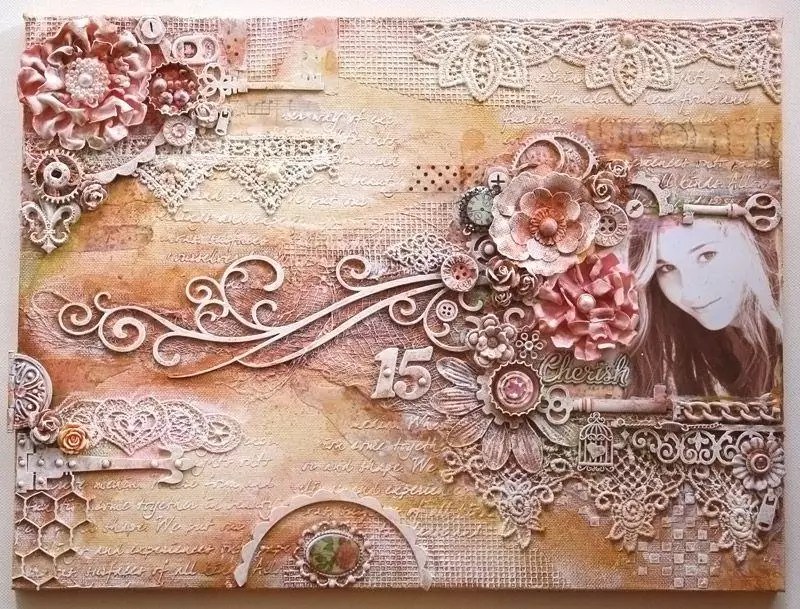
And if you purchase a canvas, then using the decoupage technique, you can turn it into a picture that resembles a real oil painting.

Decoupage techniques
The decoupage technique involves gluing a picture to a prepared surface and then coating it with varnish, as a result of which an integral work is created. But this is in the most general terms. Since in fact there are several decoupage techniques, and each allows you to get a unique result:
- classic (the napkin is glued to the surface in a dry, wet or hot way, varnished);
- artistic, smoky (the pattern is skillfully combined with the background)4
- reverse (the pattern is applied on the inside of the transparent surface);
- decopatch (as a result, the craft looks like it is covered with a patchwork cloth);
- volumetric (created using paste, material such as eggshell and structural paste, the image is embossed).
Most often, when talking about decoupage, people represent the classic technique, which is also called napkin. It is from her that it is worth starting to master the skill for those who take the first steps in this field. What does a beginner need for decoupage?

What do you need for decoupage for beginners?
In order to compose full list what you need for decoupage, you need to imagine how the whole creative process takes place.
- Choose an item for decoupage.
- Prepare the surface: clean, grind, degrease, prime if necessary, cover with paint.
- Apply glue.
- A pattern is cut out of a special napkin.
- Impose the pattern on the surface covered with glue. So that it does not deform at the same time, use a regular stationery file.
- Expel air from the center to the edges, smooth.
- Coated with varnish, usually in two layers, allowing each of them to dry.
It is impossible to carry out all these actions without a minimum set of tools and materials necessary even for beginners who do not claim to create true masterpieces. Here is a list of these items:
- Item for decoupage. Often you can find it at home, but sometimes you have to purchase a weaving item separately. As already mentioned, it can be a canvas, a wooden board or a box, a plate or a bottle, maybe something else. Only by choosing an item for decoupage, you can choose a napkin with a suitable pattern.
- Napkin or napkins for decoupage. It is better to choose special napkins that are sold in specialized stores. If this is not available in your locality, you can order napkins via the Internet.
- Sandpaper(any will do).
- Alcohol, vodka or a napkin soaked in an alcohol-containing surface degreasing liquid.
- Primer. Acrylic primer is better suited for decoupage, you can buy it in artist stores.
- Acrylic paints. They are needed for painting surfaces, for painting an image if it is slightly damaged during gluing the picture. It is acrylic paints that are needed: they dry quickly, are easy to apply, they can even be washed off if a little time has passed after application (this is especially important for beginner decoupage masters).
- Glue. You can use special glue for decoupage, but experienced craftsmen say that ordinary PVA is not inferior to it and even surpasses it: it is not noticeable, it holds well.
- Acrylic lacquer. It can be very different, including allowing you to give a diamond shine or, on the contrary, dullness. You can even get a craquelure effect polish that gives things a vintage look (this polish cracks when it dries). It is important that the varnish is acrylic.
- brushes for applying primer, varnish, paint. Wide and flat, but not hard, synthetic brushes 2 cm wide are best suited. Thin kolinsky brushes can be used for painting.
- office file.
- Scissors with thin and slightly curved tips, manicure can also be used.
- Small roller. If necessary, you can do without it by expelling the air and smoothing the drawing with a wide brush.
An experienced craftsman may need other materials and tools, but for a beginner, the items included in the list will be enough. Creative success!
Decorating various objects with the help of ready-made pictures, ornaments is a very exciting activity, the different techniques of which can be mastered by everyone, regardless of age. Many people want to express their individuality, to join the beauty, but not everyone has the skills of painting, drawing, sewing, which will take a lot of time to master. Therefore, decoupage for novice masters will be an excellent start in mastering man-made creativity.
As an art form, it is first seen in 15th century China, when furniture was decorated with carved images. But this hobby gained the greatest popularity in Europe, which came from Asia through Venice, which carried out active trade with the Far East. Technology has evolved over the years and is still very popular today. different countries. Only now, with its help, they decorate not only furniture, but also a variety of interior items, Christmas tree decorations, dishes, clothes, and other items.
Decoupage - what is it and where is it used
The word decoupage came from French, literally translated as "cut". The technique consists in drawing a picture, an image on the surface of various objects, followed by coating the finished composition with varnish. The lesson is not difficult, but one cannot do without artistic taste. With it, you can uniquely design different elements made from the following materials:
- glass;
- fabrics, leather, eco-leather;
- wood, MDF, chipboard;
- cardboard, paper;
- metal;
- plastic;
- ceramics, porcelain.
The scope of decoupage is huge. You can apply the design on different designs:
- furniture, caskets, mirrors, combs;
- pencils, pens, notebooks, notebooks, covers, books;
- flasks, bottles, napkin holders;
- trays, plates, tea sets, bread bins, refrigerator, microwave oven, other kitchen products;
- clothes, shoes, bags, hats, all kinds of fabrics;
- watches, paintings, albums, flowerpots;
- tablecloths, duvet covers, curtains, other textiles.
Necessary tools and materials for creativity
Beautiful decoration of handmade objects can become an exciting hobby that will allow you to create great compositions. With the help of decoupage, you can decorate a variety of surfaces and things. However, it should be remembered that when working with materials that do not absorb varnishes and dyes, it is necessary to use special formulations designed for specific raw materials.
Before you start practicing this technique, you need to select a workpiece on which the drawing will be applied, prepare the consumables and tools necessary for work. The success of the created composition largely depends on correctly performed actions, so the issue should be approached with all responsibility. To do this, consider in more detail the preparatory process.
Base selection
Decoupage can be applied to objects made from almost any material, be it wood, plastic or glass. But often, beginners are faced with the question of where to start, what basis to choose for work, so as not to spoil the interior during training. The problem is easy to solve, for this you can use:
- Special blanks made from raw wood, MDF, papier-mâché, which can be purchased at specialized stores.
- Old things, quietly gathering dust in the attic or in the pantry. Preparing and decorating their surface.
- If it is not customary to store outdated things in the house, you can stroll through flea markets in search of interesting items.
- Walk through the rooms and look around, you can certainly find shabby, unpresentable things or furniture. It can be tables and chairs, trays, mirrors, a sofa, a cabinet, and other items.
List of tools
To carry out any activity, you need to have certain tools at hand. Decorating cannot be done without a minimum set of special tools. They need very few. Consider the list of required elements used in the work:
- Sharp manicure, stationery scissors with thin and slightly curved tips for cutting paper or fabric.
- A spatula will be required when working with large wooden objects for applying a primer.
- Brushes, sponge, soft textiles for applying varnish, paints, glue.
- Artistic brushes are used when necessary to emphasize, highlight certain details of the composition.
- Disposable plates, jars, other improvised items used for mixing paints.
- A small roller that is used to smooth the glued image to remove air bubbles.
- Measuring instruments, a simple pencil, an elastic band.
Consumables
Having prepared a set of tools, we proceed to consider the list Supplies. For work you will need:
- Sandpaper. Used to clean the surface of the base. You should choose a product with medium and fine grains. The first type is used for initial grinding, the second for finishing.
- Degreaser. Alcohol, white spirit, acetone, alcohol wipes, vodka.
- Putty. It is used to eliminate defects on the surface of wood.
- Primer. It is recommended to use an acrylic primer, it can be purchased at specialized points.
- Glue. There are special compositions for decoupage work, but they are quite expensive. Experts say that ordinary PVA is in no way inferior, it is invisible, it glues the components well.
- Acrylic paints. Necessary for coloring or painting an image. They dry quickly and are easy to work with.
- Magazines, paper, photographs, decoupage napkins.
- Acrylic lacquer. You can use any options to give the desired effect, whether it be gloss, haze or craquelure.
Choice of napkins and paper
For drawing an image, use different materials. Most often three-layer napkins, but the list is not limited to this. In this technique, you can find the use of various paper products:
- Napkins. For beginners, it is better to use these elements for learning. However, they must be handled very carefully, as they are quite thin, they can tear. There are products consisting of two and three layers.
- Decoupage cards. In fact, these are ordinary sheets of paper on which images are printed in a typographic way. They differ from each other in density and size. They are stronger than wipes.
- Rice paper. It is a very thin, loose material made from rice straw. In terms of durability, it is not inferior to cards. Suitable for decorating any item.
- Mulberry paper. By its properties it is comparable to rice counterparts, it is soft. Ideal for glass work.
- Gift paper. Before work, it will need to be soaked in warm water for 2-3 minutes, dried on a cloth, otherwise it will not absorb glue.
- Printout on the printer. You can download any drawing you like from the network, print it on a regular A4 sheet.
- Clippings from magazines. Magazine images are similar to regular printer printouts.
- Photographs, postcards. They are rubbed with sandpaper to make it thinner, then glued to the selected surface.
Decoupage cards are forbidden to clean with sandpaper from the back.
Decoupage techniques and step-by-step master classes for beginners
You can decorate household items, furniture, accessories and other little things in a variety of techniques. The most common type of needlework is decoupage. With the help of napkins and other paper pictures, you can give objects an unforgettable unique look. For each material, it is convenient and practical to apply a picture in a certain way. It is better to decorate transparent plates using the reverse decoupage technique; volumetric application is suitable for panels.
You don't need to be a professional to create original products. A simple way to decorate with a description is suitable for a beginner. To achieve the result, it is necessary to perform the standard steps of step-by-step master classes: prepare the surface, glue the decoupage motif, paint on the edges, varnish. You can learn more about the technique by studying the following master classes.
Direct decoupage - a classic technique
The method of applying napkins is often used to decorate rounded objects, vases, bottles, pots. It is the most popular and easiest for beginners. Using this method, you can create original packaging for drinks, decorate it thematically for a holiday, any celebration.
We start with the preparation of materials. The bottle must be smooth with smooth curves, without embossed inscriptions, relief. As the most portable picture, you can use multilayer napkins, newspaper clippings, any pattern. The thinner the paper, the easier it will be to glue. You will also need to prepare PVA glue, acetone, brushes, acrylic varnish. To make a great gift with your own hands, simply follow the following instructions:
- Preparing the surface of the bottle Soak in soapy water, clean the label;
- We degrease. Wipe with a cotton swab dipped in acetone;
- We prime. This may be a vitreous varnish and other suitable compounds;
- Let's darken. Acrylic paint is suitable for this. Using a sponge, we coat the entire surface or the required area;
- We choose a motive. We cut out a picture from a purchased napkin, a magazine, we prepare a photo;
- Remove the top layer of paper. Photo paper, thick sheets should be softened in water and divided into layers;
- Glue. We apply glue to the bottle and lean the picture. After we iron it with a roller, soaking it in diluted PVA;
- We fix with varnish. If you apply several layers of the composition, the gift bottle can be washed.
Subtleties of reverse decoupage
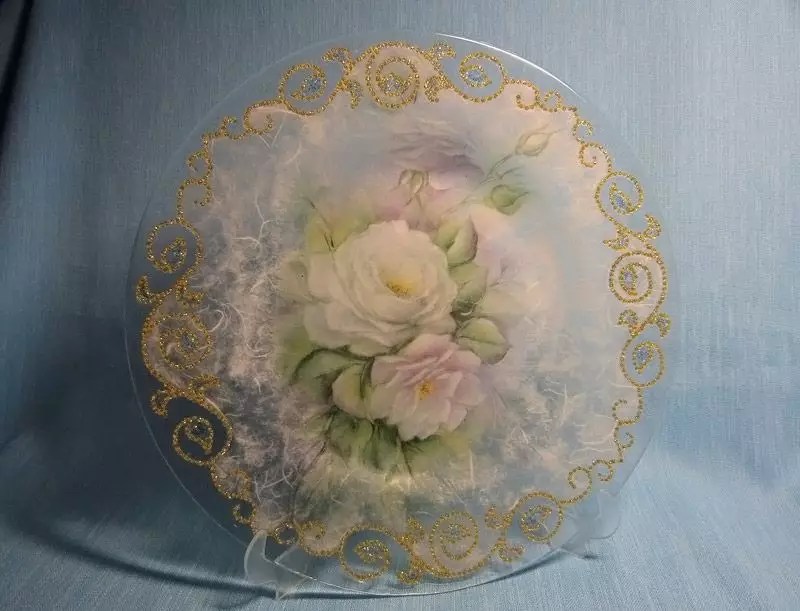
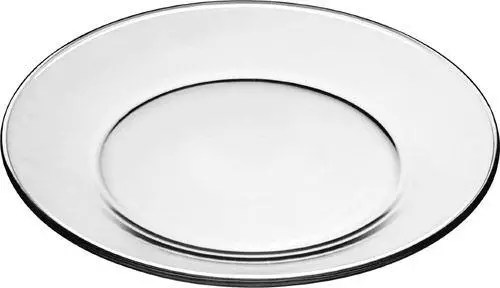
In this technique, you can transform a simple glass plate, turning it into an expensive porcelain product. It will be a classic decoupage, but on the reverse side. To work, you will need a standard set of tools and materials. If it is needed artificial aging, for applying "traces of time" you can use craquelure varnish.
We start with surface preparation. We turn the plate over with the back side, carefully degrease it - wash it, wipe it dry, wipe it with alcohol. We try on the prepared ornament in size, carefully cut off its edges. It is better to choose one large picture than 3-4 small ones. This will make the job easier for the beginner. It is not necessary to decorate the entire surface. Flowers look good on one side, going to the bottom and border.
We coat the napkin with varnish and attach it to the bottom of the plate.
If the paper is translucent, white acrylic paint should be applied over the drawing. If desired, you can make a bezel using a contour.
Artistic or smoky decoupage
In this technique, the decorated picture completely merges with the background, looks like a real painting. It will be almost impossible to determine the boundary of the transition. You can decorate any surface with the continuation of color, shadows, recreation of the environment.
With the help of haze, you can convey the three-dimensionality and depth of any object. It is better to decorate a small box using this technique. You can do this before gluing the paper or after. The haze effect should always be lighter than the object being decorated. You can create haze in several ways: acrylic paints, wax crayons.
Smoky decoupage will look great on a simple jewelry box. Conduct first standard procedures in preparation, we clean, degrease all surfaces. We do the usual pasting with suitable pictures. Missing details can be painted on with acrylic. Now cover the entire box with varnish and leave to dry.
The final stage of decoration is the creation of haze. To do this, dip the brush into the retarder and into thick paint, it is better to take one tone or a little lighter, put a dot on the edge of the picture. With a sponge, blend it in the direction from the edge of the picture. It is necessary to draw out the tonal transition very quickly, until the mixture thickens.
When the entire surface of the box has been processed and dried, the haze of the primary colors should be slightly muffled. We take a piece of a sponge, dip it into the background paint and walk along the edge of the picture, removing excess brightness. We cover the box with varnish.
Decopatch - ease of starting
The decopatch technique, close to decoupage, is often used in conjunction with needlework lessons. Easy to make, suitable for beginner needlewomen. As a base, you can use a funny figurine made of any material, flower pots, any home accessories.
Papier-mâché (cardboard) figurines are ideal for creativity. We choose the right one and stock up on the materials necessary for work.
It is necessary to prepare several sheets of special rice paper with various patterns, brushes, PVA glue, varnish on water based. First, we prepare the material for the decopatch - we tear the paper into pieces, 2x2 cm in size, it can be larger, it all depends on the size of the craft itself. We glue pieces of paper on the papier-mâché product with an overlap. The entire surface should be closed, the gaps will look inharmonious. Joints should not be visible even at close range. We cover the figure with varnish and let it dry.
This method of decoration is suitable for flower pots that have lost their former attractiveness. Chaotic pieces with no plot will look original on a surface of any size. Visually, decopatch resembles patchwork, but instead of fabric, special thin paper is used.
To decorate a ceramic pot, you will need the base itself, sandpaper, glue, brushes, sponge, paint, multi-colored rice paper. First of all, we prepare the ceramic surface, clean it, coat it with glue and primer. You also need to grab a small strip from the inside. I tear the paper into small pieces and glue it to the pot. You can leave the surface in its original form or give it the structure of a stone by removing a little paint with a cotton swab with acetone. We fix the drawing with acrylic varnish.
Volumetric decoupage and its features
The technique of creating three-dimensional images is independent and unique. Having mastered it, you can create author's paintings, souvenirs, fridge magnets with your own hands. It is much more complicated than simple paper cutting, but it is easily mastered by novice craftsmen. It is enough to follow simple rules when working. The meaning of 3D decoupage is layering pictures, gluing elements on top of each other.
To create one composition use a minimum of 5 printed copies. The number of sheets depends on the complexity of the transferred image. A three-dimensional view of the image is given by silicate glue, glaze, and special varnish. Be sure to distinguish three zones: background, foreground, section of intermediate layers.
It is necessary to prepare for possible difficulties with gluing small parts. This may require nail scissors, tweezers, thin brushes.
Necessary materials and tools
To create a beautiful "live" picture, materials and tools should be selected carefully. Paper for work should be moderately thick. It is better to use several types of it for layering. In addition to the main raw materials, the following materials and tools will be required:
- A piece of plywood, boards as a base;
- Scissors for large and small parts;
- PVA glue, silicate;
- Glaze, water-based varnish;
- Knife, cutting mat;
- Paints and brushes.
The article will tell you in detail what decoupage is for beginners - step by step with a photo we will analyze the rules of use and how the room is decorated. Conventionally, the article is divided into three parts:
- The first section is devoted to an introduction to decoupage - what it is, how to enter the technique for a beginner and what tools are needed in order to become professional specialist in this domain;
- Second - practical advice regarding techniques and use cases;
- The third section will help beginners decide on ideas to implement using the methodology.
What is decoupage?
Let's start with a definition. Decoupage is a decor technique using a cut (torn out) image, which is glued to the surface of the workpiece and then fixed with varnish. Sounds not so difficult, but subtleties great amount. Let's try to understand the features of the technique.
 With flowers
 Who is decoupage suitable for?
Decoupage is an application - such activities are known to most of us from kindergarten. The technique itself requires both attention and perseverance, therefore the ideal candidate for a decoupage artist would be a person who would like not only to make beautiful work, but also to have fun, to escape from everyday bustle.
Important: There are no health restrictions during classes, but you need to remember that some substances used in sticking can cause allergies.
That is why it is necessary to carefully read the composition of the mixtures before you sit down to work. Otherwise, decoupage is a great activity for both adults and children's entertainment in the evening.
Decoupage basics for beginners - all the important points
The process should not cause any particular difficulties, if you approach the matter progressively. The sequence of decoupage actions for beginners (step by step with a photo) looks like this:
- Surface preparation (sanding, priming, etc.);
- Gluing a decoupage motif;
- Intermediate varnish to protect the motif;
- Painting, other decor techniques;
- Finish varnishing.
 Decoupage example
 Each stage is important in its own way and has a number of its own characteristics. We want to tell you a few secrets that will simplify your work.
- When working with paint, primer, use small containers up to 250 ml, and not whole containers. So you will not bring dust and debris and the substance will last you longer.
- For grinding surfaces, a coarse-grained nail file is suitable - you can process fine details with it.
- When decorating glass, use pre-prepared primer for difficult surfaces.
- When decorating boxes, check how the hinges open.
- When gluing napkins, use the file. Wet a cloth on it and then apply to the surface.
- After you have glued the napkin, do not rub off the remaining glue. Do this after the first coat of varnish.
 Furniture
 What you need for decoupage for beginners: a list
To start creating your own product, you do not need to be a professional - the technique is suitable for a beginner. What do you need for decoupage? The list is given later in our material.
Let's decide on the materials. For classes you will need pictures:
- Ordinary paper napkins with a pattern;
- Pictures printed on very thin paper using a printer;
- Special paper.
Model name
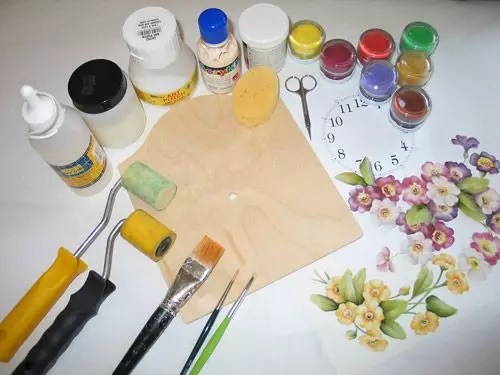
 Tools for the job
 - The object of decoration is almost any item, but it looks best on an untreated wooden surface. Suitable wooden cutting boards or trays.
- You will need scissors - small nail scissors with rounded ends are most preferable.
- To glue the picture, buy decoupage glue. There are options for using both special glue and ordinary PVA.
- Coating varnish. Buy varnishes with both matte and glossy effects. Some types of glue contain elements of varnishing, additional use of varnish is not necessary for them.
- Don't forget the brushes. There are many options in stores, but synthetic ones work great, especially flat ones. Use special rollers, but it is more convenient to smooth the napkin with them, and not to apply glue.
Decoupage techniques - photo instructions and video tutorials
Let's try to figure out what items are decoupage and what comes out of it as a result.
Decoupage bottles for beginners: step by step with photos (17 steps)
One of the most common technique options is bottle decoupage for beginners. Step by step with 17 photos, we will analyze this process further. What does it take to turn a bottle into something attractive?
 | 1. First, you need to prepare the surface of the future crafts. For this, any empty glass bottle is selected. Remove the label and wipe it with alcohol. |
 | 2. Apply the primer on the glass with a brush or roller. The soil is sold in a specialized store. |
|
3. We apply a layer of paint. Suitable for acrylic or water-based. |
 |
4. Put a napkin sheet with a pattern into the water. In parallel with this, we apply decoupage glue or PVA. |
 |
5. Remove two layers from the napkin and apply it to the surface of the bottle. We iron with a roller so that there is no air. |
 |
6. After drying, apply a layer of varnish. |
 |
7. On the sides of the picture we will make decorative elements using putty. To do this, first outline the contours of the picture with masking tape. |
 |
8. We apply acrylic putty over the entire surface. Next, we make lines with a match, imitating a stone. |
 |
9. Immediately remove the adhesive tape until the putty has dried. |
 |
10. Completely dry the surface and sand it with sandpaper. |
 |
11. We take dark acrylic paint and apply it to the surface with a brush. |
 |
12. We still cover with one more layer of varnish. |
 |
13. Apply golden wax with your fingers, you get an antique effect. |
 |
14. Apply glue to the moment of the crystal on the neck of the bottle. Next, add a chain. |
 |
15. We paint the cover with bronze acrylic enamel. |
 |
16. Apply a layer of glue and then wrap several layers of twine. Next, attach a decorative lock to it. |
 |
17. We are waiting for the composition to dry. The product is ready. |

Decoupage for beginners: step by step on wood (6 steps)
Decoupage for beginners on wood (step by step below) needs a special kind of surface adhesion with the application.
 | 1. Prepare the surface. To begin with, we remove the past paint from it (if any) and clean it. After we cover with a layer of acrylic primer. After drying, apply another layer. |
 | 2. We take a three-layer napkin and separate two layers from it. After that, apply to the surface. we will stick on the yacht varnish. We apply the first layer. |
 | 3. Upon completion, decorate the top of the board. |
 | 4. We cover the board with a layer of varnish, then apply another 2-3 layers. Then dry for 24 hours. |
 | 5. Rub linseed oil on the other side of the board. |
 | 6. Let the product dry, the composition is ready. |
Decoupage on plastic: video instruction with comments
Here we need plastic - it is sold in any hobby store.
- We prepare the surface. To do this, wipe it with an alcohol solution and remove the label. Next, apply a layer of acrylic paint.
- Cut out the desired pattern.
- The next stage - a drop of glue is squeezed out onto the resulting plastic form, after which a paper cutout is glued onto it. Cover the paper cutout with glue from the outside - so it can be varnished (in such cases we recommend using a special glue varnish).
- Sending finished form into the oven. After frying, make a magnet from a plastic blank by attaching a magnetic tape to its base with glue.
Decoupage for beginners from napkins: step by step instructions for beginners, 5 steps with photos, videos
 | 1. Take a piece of the file and put a napkin on it face down. First, separate two layers from the napkin. |
 | 2. Pour a little water onto the napkin and smooth the edges with a brush. |
 | 3. We apply the file to the surface and remove excess air bubbles with a brush. |
 | 4. Slowly tear off the file from the surface, leaving a drawing on it. |
 | 5. Apply a layer of glue over the drawing with a brush. After that, cover with a layer of varnish. |
You can see more clearly how decoupage is done from napkins in the video.
Decoupage cutting board for beginners - video instruction and comments
With the help of technology, they design and wooden board. How to do it? We follow the instructions:
- To begin with, the surface of the board will need to be primed. To do this, white acrylic paint is applied to it (this is done with a sponge, in two layers and with drying).
- The necessary composition is cut out from the selected napkin. Only one layer is needed, so if the napkin is two-layer, then you will have to part with one.
- We place the pattern on the surface and carefully cover it with a layer of glue (diluted in proportions 50/50). So that the napkin is not damaged, try to smooth out the formed folds (and they are sure to form) with light movements of the brush.
- Let the glue dry a little.
- It's time to cover the board with acrylic varnish (initially it will be white, but it will become transparent during the drying process). It will not be superfluous to cover the board with furniture varnish.
- Wait until the varnish dries and use the board for its intended purpose.
 On a cutting board
Video master class on fabric with comments
A few words about the technique of decoupage on fabric.
- The fabric is laid out on the surface - so that there are no wrinkles. The finished drawing is placed on the surface and leveled (by hand and with a roller). The placement is fixed by a disappearing marker.
- With PVA glue, the place marked for the drawing is covered, where it is expected to dry completely. If the glue is thick, dilute with warm water.
- In the event that the drawing is transferred from a napkin, then do not forget to remove the bottom layer. The top one must be applied to the place where the glue has already dried up.
- At the top, the napkin should be covered with wax paper, and then ironed. Ironing is carried out from the middle to the edge, the procedure lasts no more than 5 minutes.
 On fabric
 Advice: A little advice - so that the work surface does not deteriorate with glue, place a plastic bag or stationery file under the fabric.
Full version of the master class on video.
Eggshell decoupage - video and useful tips
Interesting patterns can be made using an ordinary eggshell. Let's see what happens.
 On the plate
 Use a plastic plate, which is pre-plastered and degreased.
- Apply glue to the surface of the plate so that the shell does not “float” in it.
- We take the shell, divide it into not too large pieces, lay out the concave side inward.
- With a toothpick, we break the shells to the required size.
- It is necessary to make the shells of the same color - for this, paint over in two layers (drying).
- When the surface is leveled, attach the shells to the glue.
- After that, glue the napkin. Glue with light movements with a brush or a finger dipped in water so as not to tear the napkin.
- Let the product dry and then decorate the room with it.
What is decoupage? Decoupage is the perfect hobby. With it, you can create works of art from wood, glass, ceramics, stone and many other materials. You do not need to be able to draw, sculpt or carve; all that is needed for decoupage is imagination, the ability to see beauty in simple things, patience and the desire to transform.
Historical reference
Since the 15th century, this technique has been used to decorate furniture in medieval Northern Europe. Later, when trade with the east flourished, decoupage was used to imitate Chinese and Japanese furniture painting.
This decoration technique became especially popular in France, hence the roots of the name; "Decoupage" is a French word meaning "carving" and reflects the whole essence of the process of decorative technique.
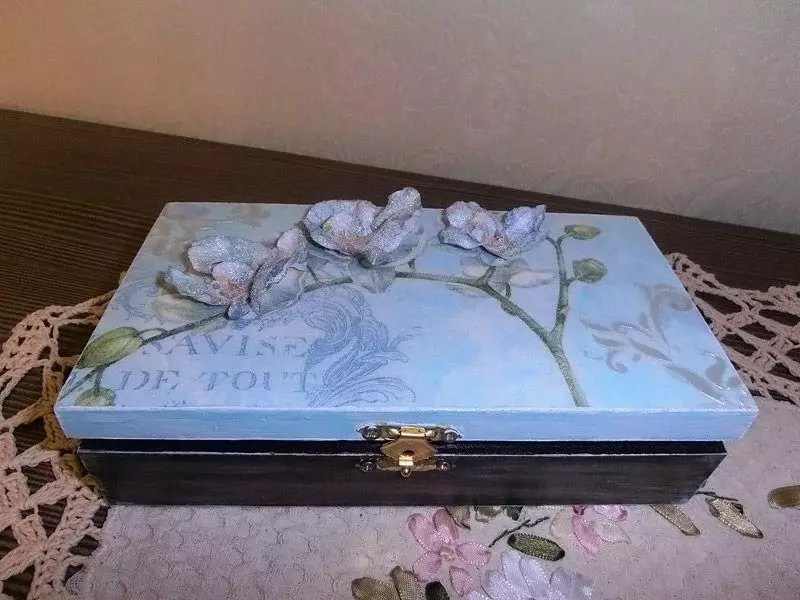
French mademoiselles loved to decorate their boxes with idyllic pictures in the style of Boucher or Watteau. To this day, the most popular patterns for decoupage are floral motifs in romantic colors.
Decoupage as a decoration technique
What is decoupage today? In the context of the modern world of hand-made, decoupage is a simple and inexpensive technique for decorating various items, from furniture to tiny accessories. In order to transform an ordinary surface, you need to select a finished drawing made on thin paper, cut it out and stick it on the selected object. This is decoupage.
Sounds surprisingly simple and rude. It would seem, what is the art here? What kind of object would benefit from having a picture glued to it? But not everything is so simple - decoupage is not simple, and one cannot do without an artistic approach to business.
A properly selected, carefully cut and beautifully designed pattern can give a second youth to furniture and decor. An original gift for the New Year will be a beautiful Christmas ball; on Easter you can surprise your loved ones with beautiful Easter eggs; A uniquely decorated bottle of wine will decorate any festive table.
All this can be done with your own hands and without any special expenses using the decoration technique called decoupage. The photos presented in this article only slightly open the door to the magical realm of decoration.
Necessary materials

For decoupage, the following materials are needed.
- Decorated surface - any object that is planned to be transformed. It's best to start with a smooth, level surface, such as a jewelry box, cutting board, flower pot, or bottle. Degreasing liquid or wet wipes, in order to clean the surface from stains, dust and grease.
- ground cover; for glass and ceramics, a layer of acrylic paint is enough; for wood, it is best to use a professional primer, and apply the paint after the primer has dried.
- Patterns suitable for the selected surface. For this purpose, napkins, newspaper and magazine clippings, or even drawings previously printed on a printer are suitable.
- Scissors; it is best to use small, thin scissors to more accurately cut out the fine details of the pattern. You can cut out the drawings with a clerical blade.
- Decoupage glue or PVA glue.
- A set of brushes and sponges; instead of sponges, you can use small pieces of sponge, which is convenient to apply a primer layer of paint to the surface. A flat synthetic fiber brush is best for smoothing the paper while drawing on the surface, while thin brushes are needed for additional lines and finishing touches.
- Fine sandpaper or very fine polishing paper is especially needed when working on wood.
- Acrylic varnish for the final layer.
Of course, you will need a number of paint containers, a palette, masking tape and a container of water. The above materials are enough to master the decoupage technique. However, there are a number of additional accessories and materials used in this technique: various kinds of sequins, gilding, varnishes for artificial aging (craquelure) and skins for polishing and rubbing.
DIY decoupage
For the first works, it is best to decorate objects with even and strong surfaces, use PVA glue (it dries transparent and is easily washed off) and drawings made on napkins. In this case, even if the first attempt at decoupage comes out lumpy, you can gently rinse everything off the surface with water and try again.

In terms of technique, decoupage for beginners is no different from professional decoupage - the same tools and materials, the difference is only in manual dexterity, knowledge of textures and the ability to foresee the end result.
The main task when drawing a pattern on the surface is to stick it so that there are no wrinkles, lumps of glue and air bubbles under it. To do this, the pattern is moistened with water and smoothed over the surface using a wide flat brush. This is not easy, especially given how easily a wet wipe tears. It may take a few tries before the pattern fits perfectly.
One of the little tricks is drawing a picture using a plastic file. To do this, the drawing is placed “face down” on a regular file (not in the file, but on top) and smoothed out using a brush and water. The drawing must be completely covered with water and fit snugly to the file, without folds.
Using the file, the drawing is easily applied to the surface covered with PVA glue. The main thing is to carefully expel all the water from under the file after application, for this you can use a spatula or a soft towel. With this method it is convenient to work on wide and flat surfaces.
Decoupage of glass items

In modern needlework, the transformation of bottles into an object of art occupies a separate and honorable place, but not only bottles can be transformed using the decoupage technique. With your own hands, from ordinary plates, vases, glasses and jars, you can create unique and bright things that will decorate your home or a wonderful gift for loved ones.
Used bottles can be turned into exquisite vases and souvenirs using only acrylic paint, glue, lacquer and selected designs on paper. Decoupage makes you see the potential in ordinary and boring things and turn them into unique ones. It is this attitude to surrounding objects that best answers the question “what is decoupage”.
Easter decoupage - photo master class
Internet is full of various options coloring eggs for Easter, and Easter decoupage offers new approach to this interesting tradition.

Using the decoupage technique, you can decorate wooden, plaster and plastic blanks, as well as eggs, which will then be eaten. Boiled eggs are best decorated with a paste made from starch or flour, and covered with egg white for shine; thus, no harmful chemicals are used when painting Easter eggs.
Furniture decoupage

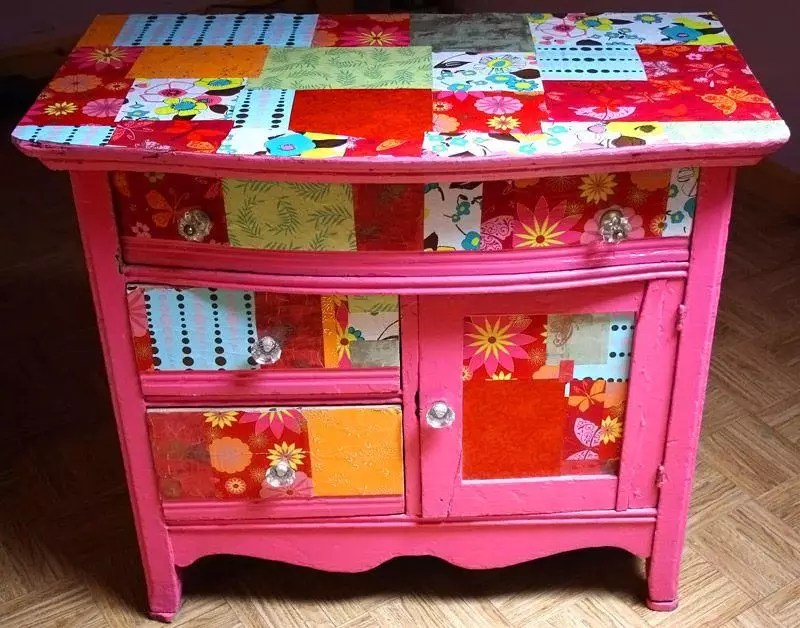
After the answers to the question “what is decoupage” are received, and the hands are familiar with the basic actions, you can move on to a more complex level and start decorating furniture using the decoupage technique. A master class on decorating furniture is different in that it is more like a restoration process, turning an old grandmother's chest of drawers into a work of art.
Do-it-yourself decoupage of furniture items is associated with higher financial costs, since more material and time are needed for processing. A piece of furniture, be it a chest of drawers, a stool or a table, is larger than the accessories, so the amount of material increases, as well as its quality.
In order to reach appearance vintage antique furniture, in addition to the decoupage technique, it is necessary to master the techniques of artificial aging, which require a lot of time and additional materials.
New Year's decoupage

When the level of proficiency in decoupage technique has moved from elementary to intermediate and is confidently moving to new heights, you can try decoupage of a fragile Christmas tree decoration. To do this, you need to select materials. New Year- the most suitable occasion to use sequins and rhinestones to create a festive composition.
The toy can be an old and boring heirloom in need of restoration or bought from an art supply store specifically to be painted. It can be a ball, a Christmas tree or a symbol of the New Year. Don't limit yourself to just Christmas decorations, you can decorate candles, champagne bottles, glasses and even a tablecloth for a festive table.